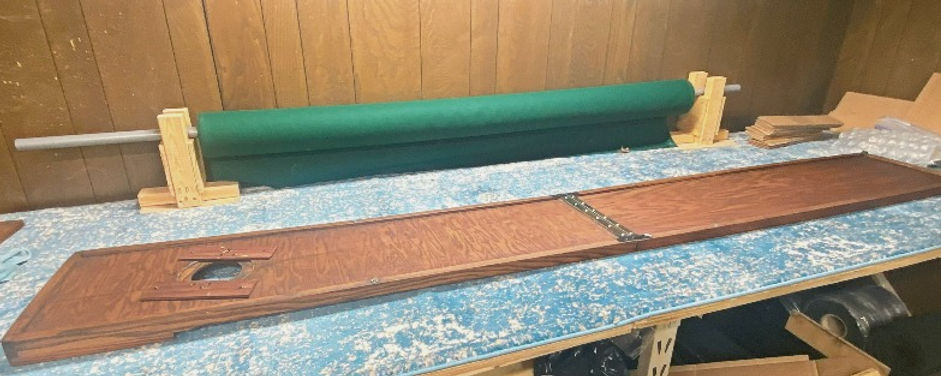
Lay the platform face down where the platform can be extended and maneuvered for installing parts and making the settings for Robo Cup and Adjustment bolts.
Installing the Robo Cup and two sets of adjustment bolts.
Tools required in #2 - Phillips screwdriver and Ruler. Set up and positioning requires a 7/16" and 1/2" open wrench, ruler, and level.


# 2 Phillips screw head
Installing Robo Cup
Remove the two pre-set screws left in place for holding the Robo kit in place.
Lay the Robo cup in place with the open end facing the rear of the position.
Replace the screws through the hole of the "L" bracket. Default setting is in the middle.
Hint: Settings are for the Robo Cup releasing the ball through the 2" hole reducer.

Take out the four adjustment bolts from the packaging.

Remove Knob and Washer from bolt
Use the 7/16" wrench to hold the nut in place while removing the washer and black knob.
The shorter bolts go in the rear platform railing and longer bolts go in the front platform railing.
Screw the bolts into the inserts extending them to the other side.


Turn platform on its side and continue installing the bolts. The rear bolts will be about 3 1/2 " out the bottom.
Hint: This is a temporary setting and will be a major factor when setting up the platform later.
Install the longer adjustment bolts thtough the inserts on the front platform close to the Robo cup. The bottom of the bolt should extend an inch longer than the Robo cup.

Turn the platform over with the putting side up
Replace the nut/washer back on the bolt one inch. Replace the knob on the bolt, about 1/2". screw the nut/washer back to the knob. Hold the knob in one hand and using the 7/16" wrench lightly tighten the nut/washer to the knob.
This would be a good time to check the foot to the bolt. Using a 1/2" wrench hold the foot tighten the bolt to the foot. Using the 7/16" wrench to tighten the nut/washer to the foot pedal.

Set up and adjusting the pestels for ball-roll

The front and rear can be at different angles to achieve the preferential speed and accuracy. The height of the front is used to create a faster and slower ball speed. Simulating Stimp speed of 9 to 13. Removing the adjustment bolts and laying the platform flat on the floor for the fastest speed. Of course the balls would not return automatically. The ease of adjusting the height of front and back are major factor in preference settings. The adjustment bolts should be set up with an angle that allows wayward balls to return to their start position. The rear platform for height and angel will be first. Place the level between the pedestals centering the bubble. All though the ball should continue to starting positiion, the ball should stay stationary when placing ball on the surface. Test the rear platform by dropping a ball from 1" from the surface. The ball should stay stationary. adjust the angle of platform with the knobs, next level the surface at rear of the putting platform. If the floor is not level, a shim may be necessary to level the rear of the putting surface.
Setting the adjustment bolts for the front platform

Start by dropping a ball on the front and watch to see if the ball rolls freely. Repeat front pedestals with level to check for leveling and speed. Hint: the ball roll should roll be subtle and consistent. This may take some time but is well worth it. Remember, adjusting one knob on either side will change the setting from front and back.
Checking the 2" hole reducer

Check to see if the ball is clearing the 2" hole reducer. The center were the settings when tested but some adjustments may be necessary.
This can be done by losing the screws and moving the kit until it works satisfactorily. Hint - it can be very difficult to get the kit aligned. The ball catch and corral are recommended for use with the 2" hole reducer.
This may take some time but is well worth it. Also, the level is important to keep on hand keeping you in control of the putting slope.

The Robo kit has been set an an angle to release the ball into the channel for return. The distance the ball returns may change over time and changing the angle releasing the ball down the channel can be done from the under side by rotating the Robo Kit assembly. Remove the 2 screws holding the ring and Robo cup kit base and turn to the preferred angle.
